August 15, 2026
Costly Permit Oversights That Kill House Flip Profits
Costly Permit Oversights That Kill House Flip Profits
Three permit mistakes wipe out more flip profits than any other single category of error: unpermitted structural additions that surface at closing, wrong permit classifications that trigger stop-work orders mid-construction, and undisclosed work by unlicensed trades that expose buyers to condemnation risk. Each one can erase months of carrying costs and tens of thousands in rework before you ever list the property.
Here is what those failures look like in practice:
- Unpermitted structural addition. A flipper adds 400 square feet without pulling a permit. The buyer’s lender flags it during appraisal. Retroactive as-built permitting runs $3,000–$18,000+ depending on scope, plus 4–12 weeks of delay. Worst case: the municipality orders demolition.
- Wrong permit classification. A contractor files an ALT-2 in New York when the scope requires an ALT-1. The DOB issues a plan hold, then a stop-work order when the error surfaces during construction. Correcting a misclassified permit mid-project commonly adds six to twelve weeks or more, plus tribunal fees and remobilization costs.
- Unlicensed trade work, undisclosed. A flipper uses an unlicensed electrician to cut costs. The buyer discovers it post-close when the city issues a deadline: pull permits for all affected systems or face condemnation. The buyer absorbs the entire remediation bill.
Cost signal: Incomplete permit applications — missing site plans, setback details, or utility connections — alone cause 3–8 week restarts and five-figure added costs in many U.S. municipalities.
Key Takeaways
Permit oversights on flips are not random bad luck. They follow predictable patterns, and the financial exposure from a single mistake routinely exceeds $15,000 in combined direct and carrying costs.
| Point | Details |
|---|---|
| Top three oversights | Unpermitted additions, wrong permit classification, and unlicensed trade work cause the majority of costly flip delays. |
| Retroactive permit costs | Closing an open electrical permit runs $3,000–$18,000+; an as-built addition permit runs $3,000–$18,000+ depending on scope. |
| Stop-work carry exposure | An 8-week stop-work order on a typical flip accumulates over $15,000 in interest, taxes, insurance, and remobilization costs. |
| Pre-close due diligence | Pull the full municipal permit history, verify contractor licenses, and include a permit contingency clause in every purchase contract. |
| Miamipermitai | For Miami-Dade flips, Miamipermitai flags missing documents, zoning conflicts, and license issues before submission, reducing first-round rejections. |
Table of Contents
- Why permits control your deal, not just your paperwork
- Common permit oversights flippers make and why each matters
- Real U.S. case studies: what went wrong and what it cost
- How permit oversights translate into real dollars
- Pre-purchase checks to spot unpermitted or improperly permitted work
- If you discover unpermitted work: a practical remediation roadmap
- Preventive contract and site workflow checklist for flips
- How permit-readiness tools reduce these failures (E-E-A-T insight)
- What experienced flippers actually do differently
- Get a Miami-Dade permit readiness check before you submit
- Primary sources and further reading
- Sources
Why permits control your deal, not just your paperwork
A building permit is not a bureaucratic checkbox. It is the legal instrument that authorizes a specific scope of work, triggers the inspection sequence, and creates the public record that title companies, lenders, and future buyers rely on. Without a closed permit, there is no certificate of occupancy (CO). Without a CO, there is no clean title transfer. That chain is exactly why permit failures cascade so fast.
Municipalities enforce compliance through four main levers: plan examination objections (which stop the clock before work starts), stop-work orders (which freeze active construction), fines accruing per day per violation, and denial of a final CO. Each lever compounds the one before it. A plan objection that takes two weeks to cure is a nuisance. A stop-work order that runs eight weeks while your loan accrues interest is a deal-killer.
The public-record dimension matters just as much. Open permits and unpermitted additions transfer with title — the new owner inherits the liability, the remediation cost, and the enforcement deadline. Title companies increasingly flag these at commitment, and lenders are tightening scrutiny on permit status before funding renovation loans.
Pro Tip: Contact the municipal plan reviewer before you submit, not after you get an objection. A ten-minute pre-application meeting often surfaces the one missing document or zoning flag that would have triggered a three-week restart. Most building departments offer this informally, and it costs nothing.
Common permit oversights flippers make and why each matters
Most permit failures on flips are not exotic. They are the same handful of mistakes repeated across markets, contractors, and deal sizes. Here is where the money actually bleeds out:
- Trusting the contractor’s word on permit status. Contractors routinely say “the permit is in” when the application is incomplete or the permit is open with no final inspection. You are the one holding the asset when the title company finds it.
- Filing the wrong permit type. Scope creep during design often pushes a project from a minor alteration into a full structural alteration category. Filing the lower-tier type to save time or fees is the single most common cause of mid-project stop-work orders, which add 2–4 weeks on average for wrong permit type alone.
- Starting work before the permit is issued. “We’ll pull it tomorrow” is how flippers end up with double-fee penalties and mandatory demolition of framing that was inspected before approval.
- Using unlicensed trades. Unlicensed electrical, plumbing, or HVAC work cannot be inspected under a valid permit in most jurisdictions. If discovered, the municipality typically requires licensed re-inspection of all affected systems, not just the flagged item.
- Incomplete application attachments. Missing site plans, setback dimensions, or utility connection details are among the top causes of permit rejections. Each rejection restarts the review clock.
- Jurisdictional errors. Submitting to the city when the property sits in an unincorporated county zone, or vice versa, adds 2–6 weeks and sometimes requires a full resubmission with different forms and fees.
- Ignoring historical or flood overlays. Properties in historic districts or FEMA flood zones carry additional review layers. Skipping those reviews does not make them go away; it makes them show up as violations at the worst possible moment.
Pro Tip: Before any contractor pulls a permit, run the property address through the municipal portal yourself. Confirm the correct jurisdiction, zoning designation, and any overlay districts. This takes fifteen minutes and eliminates the two most common human-error categories: wrong jurisdiction and wrong permit type.
Real U.S. case studies: what went wrong and what it cost
San Diego: demolition without permits and civil penalties
San Diego filed a lawsuit against a property flipper alleging illegal demolition and expansion across multiple properties without required permits. The city sought civil penalties per day per violation, up to several thousand dollars, plus recovery of enforcement costs. The complaint named multiple neighborhoods and alleged the flipper concealed the scope of work to avoid plan review.
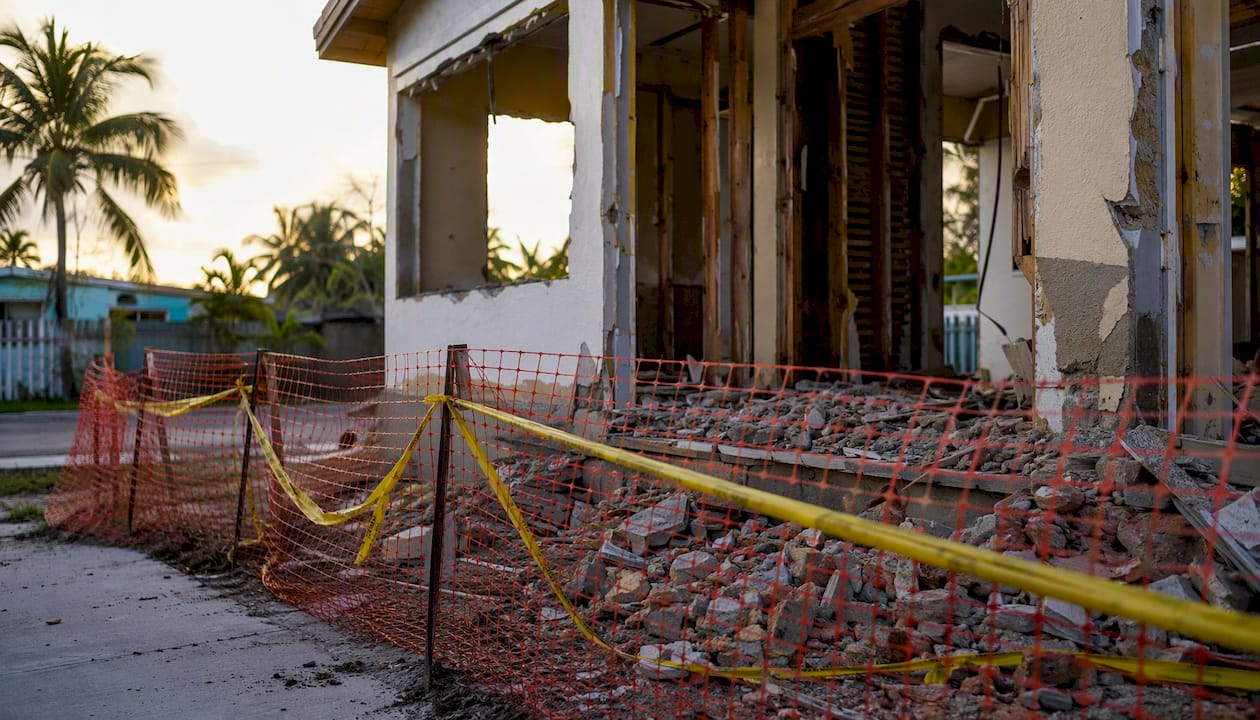
The practical lesson is not just about the dollar exposure, though daily penalties accumulating across multiple properties add up fast. It is about disclosure. Once a municipality files suit, every property in the portfolio becomes a liability. Title companies pull back, lenders freeze draws, and buyers walk. The enforcement action itself becomes the deal-killer, independent of whether the flipper ultimately wins or loses in court.
Lesson: Document every scope decision and pull permits before breaking ground. If a prior owner’s unpermitted work surfaces during demo, stop, document, and consult the building department before proceeding.
New York City: ALT-2 filed when ALT-1 was required
A contractor filed an ALT-2 (minor alteration) application for a project that included structural work requiring an ALT-1 (full alteration) classification. The DOB’s plan examiner flagged the misclassification during review. Because some framing had already started, the error triggered a stop-work order rather than a simple correction notice.
“Filing the wrong permit type in NYC commonly causes plan hold or stop-work orders and can add significant weeks of delay if refiled or if the error is discovered mid-construction.” (Hoppler Design & Build)
Lifting a stop-work order in NYC typically runs four to eight weeks through the DOB tribunal process, plus cure application fees and contractor remobilization costs. On a flip with a $4,000/month carry, eight weeks of delay costs roughly $8,000 in interest and holding costs alone, before touching the resubmission fees or the contractor’s remobilization invoice.
Lesson: Classify scope correctly before filing, not after. Have a licensed expediter or architect review the permit type against the full construction drawings, not just the summary scope.
Maryland: unlicensed electrician, undisclosed violations, condemnation risk
A Maryland buyer purchased a flipped home and later discovered the flipper had used an unlicensed electrician for all electrical work. The city had previously issued a cease-construction citation, which the flipper removed from the property before closing. After purchase, the city gave the new owner a deadline to pull permits for all affected systems or face condemnation.
The buyer absorbed the full remediation cost: retroactive permitting, licensed re-inspection of all electrical systems, and correction of code violations the unlicensed work had introduced. The flipper had moved on. This is the scenario that makes pre-close permit checks non-negotiable, not optional.
Lesson: Pull the full permit history from the municipal portal before closing, not just the title commitment. A title search finds open permits; it does not find removed citations or undisclosed stop-work orders.
How permit oversights translate into real dollars
Permit failures produce two categories of cost, and flippers consistently underestimate the second one.
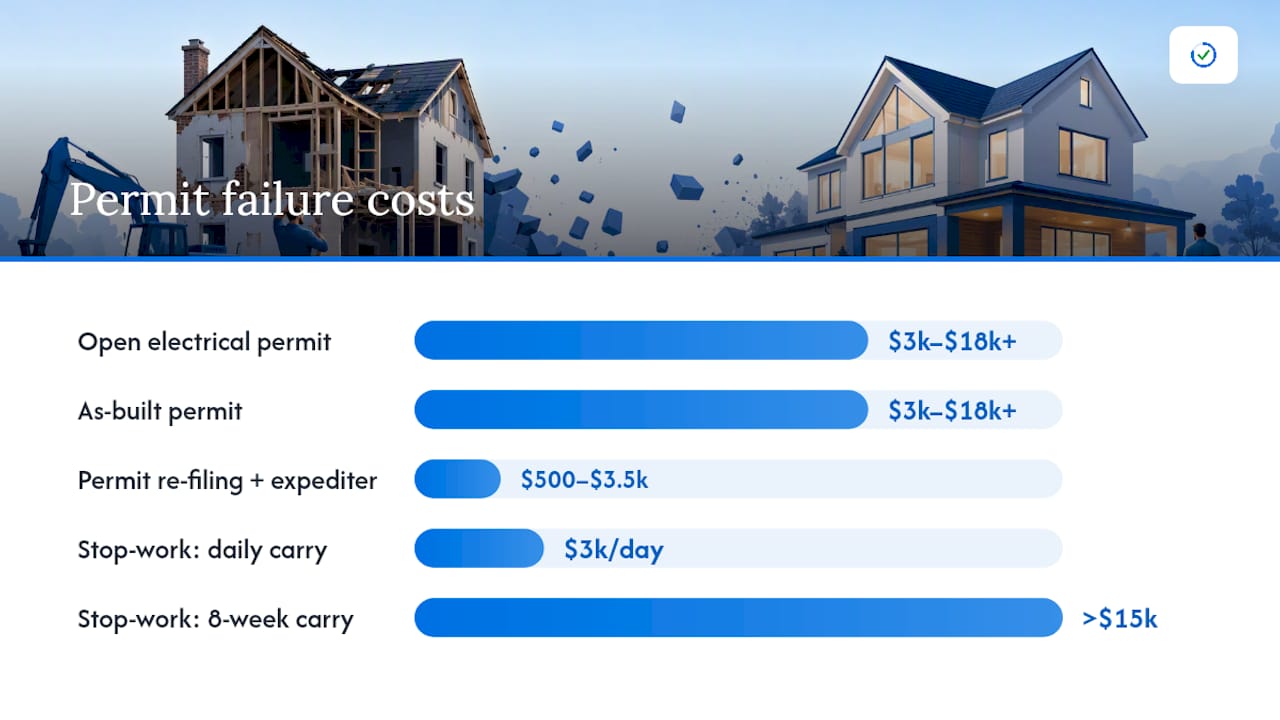
Direct costs are the line items you can quote: city fines, permit re-filing fees, required engineering or architect fees for as-built drawings, expediter fees, and mandated rework or demolition. These are painful but finite.
Indirect costs are where flips actually die. A stop-work order does not just pause construction; it pauses your entire exit timeline. Every week the project sits frozen, you pay loan interest, property taxes, insurance, and utilities. Contractors demobilize and remobilize at your expense. Appraisers discount properties with open permit histories. Lenders sometimes freeze draws entirely until the permit issue resolves, which means you are funding out of pocket.
| Cost Category | Typical Range | Notes |
|---|---|---|
| Open electrical permit closure | $3,000–$18,000+ | Licensed reinspection + filing fees |
| As-built permit, 400 sq ft addition | $3,000–$18,000+ | Architect drawings + plan review + inspection |
| Stop-work order: daily carry cost | several thousand dollars per day | Interest + taxes + insurance on a typical flip |
| Stop-work order: 8-week cumulative carry | over $15,000 | Varies by loan balance and market |
| Contractor remobilization | $3,000–$18,000+ | Per trade, per mobilization event |
| Permit re-filing + expediter fees | $500–$3,500 | Jurisdiction-dependent |
| Retroactive structural as-built | five-figure costs | Engineering, drawings, demo for inspection access |
Carry-cost signal: A single stop-work order running eight weeks on a $300,000 renovation loan at 10% annualized interest costs roughly $4,600 in interest alone, before adding taxes, insurance, and contractor remobilization. Add those in and the total exposure on one permit mistake easily clears $15,000.
Permit status also affects renovation loan approval directly. Lenders funding draw-based renovation loans often require proof of passed inspections before releasing the next draw. An open or disputed permit can freeze a draw for weeks, forcing the flipper to bridge the gap out of pocket or halt construction.
Pre-purchase checks to spot unpermitted or improperly permitted work
Three checks find the majority of permit risk before you close: pull the full municipal permit history, walk the site looking for physical red flags, and have a licensed trades inspector evaluate electrical panels, HVAC equipment, and plumbing for signs of unlicensed work. Do all three, in that order, before your inspection contingency expires.
Step-by-step due diligence checklist
- Pull the permit history from the municipal portal. Most U.S. building departments publish permit records online. Search by address and look for open permits, expired permits, and permits with no final inspection recorded.
- Cross-reference the permit history against the property’s visible improvements. If the property has a finished basement, an addition, or a converted garage and there is no corresponding closed permit, that is unpermitted work.
- Order a title commitment early. Title companies flag open permits during the commitment process. Getting this in the first week of due diligence, not the last, gives you time to negotiate.
- Walk the site with a licensed inspector focused on trades. Ask specifically about panel age and labeling (unlicensed electrical often shows in wiring methods), HVAC equipment model dates versus permit dates, and plumbing connection quality.
- Check for historical and flood overlay designations. Run the address through FEMA’s flood map portal and your local historic preservation office. Either designation adds review layers that change the permit scope and cost.
- Verify contractor license status. In Florida, use the Florida DBPR license lookup. In other states, use the state contractor licensing board’s public database. An unlicensed contractor’s work cannot be permitted under their name.
A Jefferson Parish inspector general audit of 94 third-party residential inspections found that nearly a third lacked required geotagged photos and at least four involved unregistered inspectors. That finding matters for flippers because it means a “passed inspection” stamp is not always clean. When buying a flipped property, ask for the inspection records, not just the permit status.
Contract terms that protect you: Include a permit contingency clause requiring the seller to close all open permits and produce final inspection records before closing.
If you discover unpermitted work: a practical remediation roadmap
Discovery mid-project is better than discovery at closing, but it still requires a clear sequence of decisions.
- Stop any work that would conceal the unpermitted scope. Do not close walls, pour concrete, or install finishes over systems that lack permits. Inspectors need access to the work, and concealing it before inspection turns a permit violation into a potential fraud issue.
- Document the existing condition thoroughly. Photograph everything: framing, wiring, plumbing rough-ins, HVAC connections. Get written statements from any subcontractors who can describe what was installed and when.
- Confirm the full scope of unpermitted work. Do not assume the problem is limited to what you can see. Pull the permit history again and compare it against every visible improvement on the property.
- Engage a licensed architect or engineer for as-built drawings. Retroactive permitting requires as-built drawings that show what was built, not what was planned. This is the document that unlocks the retroactive permit application.
- Hire licensed trades to inspect and certify the existing work. A licensed electrician’s affidavit that the wiring meets code is often required alongside the as-built drawings. Without it, the municipality may require demolition to the studs for inspection access.
- File the retroactive permit application with the as-built drawings and trade affidavits. Some jurisdictions charge a penalty fee (often double the standard permit fee) for retroactive applications. Budget for it.
- Engage a permit expediter if timeline is critical. Expediters know which plan reviewers handle retroactive applications and can often cut weeks off the review queue. Their fee ($500–$3,500 depending on scope) is almost always worth it on a time-sensitive flip.
- Run the cost-versus-time math before committing to remediation. Compare: (retroactive permit cost + rework + delay carry cost) versus (demolition + rebuild cost + delay carry cost). For a simple unpermitted bathroom addition, retroactive permitting usually wins. For a structurally compromised addition with no drawings, demolition sometimes pencils better.
Pro Tip: As-built drawings paired with licensed-trade affidavits are the two documents that most reliably accelerate retroactive permit approvals. Municipalities want to see that the work meets code and that a licensed professional has verified it. Submit both together in the initial application package, not as a follow-up response to a reviewer’s objection.
Preventive contract and site workflow checklist for flips
Prevention is cheaper than remediation by a factor of five to ten, and it requires organizational discipline more than specialized knowledge.
Contract clauses to require before signing
- Require proof of a pulled permit (permit number, not just a contractor’s statement) before any trade begins work.
- Tie payment milestones to passed inspections, not to work completion. No final payment without a final inspection record.
- Require contractor license numbers in the contract and verify them against the state licensing board before execution.
- Include a clause requiring the contractor to notify you within 24 hours of any municipal objection, stop-work order, or inspection failure.
- Add an indemnification clause holding the contractor liable for costs arising from unpermitted work or unlicensed subcontractors.
On-site workflow: verification points
- Pre-demo verification. Before any demolition begins, confirm the demo permit is issued and posted. Check that the scope on the permit matches the actual demo plan.
- Rough-in verification. Before any walls close, confirm that rough electrical, plumbing, and HVAC inspections are scheduled and passed. Do not let finishes proceed over uninspected rough-ins.
- Final inspection verification. Before the property lists, confirm that every open permit has a recorded final inspection. Pull the municipal portal record yourself; do not rely on the contractor’s verbal confirmation.
- Assign a permit coordinator role. On any flip with more than two active trades, designate one person (an expediter, a project manager, or yourself) as the permit coordinator. Their job is to track every permit’s status weekly and flag any that are stalled.
- Store all permit documents in a shared folder. Permit applications, inspection records, contractor licenses, and trade affidavits should live in one place accessible to your attorney, title company, and lender. This speeds closing and protects you if a dispute arises.
The required documents for a Miami-Dade renovation permit include sealed plans, contractor license verification, and product approvals for specific systems. Using a local checklist as your baseline, then adapting it to your jurisdiction, is faster than building one from scratch.
How permit-readiness tools reduce these failures (E-E-A-T insight)
This section reflects Miamipermitai’s platform capabilities as described by the client.

Permit-readiness software reduces application errors by catching missing documents and misclassifications before the application reaches a plan reviewer. That single intervention addresses four of the seven common oversights listed earlier: wrong permit type, incomplete attachments, jurisdictional errors, and flood or zoning overlay errors.
Here is what an AI-powered pre-submission review actually checks, mapped to the failure modes in this article:
- Zoning and setback flags. The platform reads the uploaded plans against Miami 21 zoning rules and flags setback violations before submission, catching the errors that produce plan exam objections.
- FEMA flood zone overlays. Properties in FEMA-designated flood zones require elevation certificates and additional review. Miamipermitai cross-references the property’s folio record against FEMA flood zone data and flags the requirement if it applies.
- Florida DBPR contractor license verification. The platform verifies that the contractor named on the application holds a current, active Florida license, directly addressing the unlicensed-trade risk that produced the Maryland case study.
- Missing document detection. The review checks the application package against Miami-Dade’s required document list and produces a prioritized fix list before submission, reducing the incomplete-application rejections that add 3–8 weeks per restart.
- Readiness score and plain-language guidance. Users receive a readiness score and a specific list of what to fix, not a generic checklist. After submission, the platform tracks the permit through Miami-Dade’s public records and sends email status updates.
For flippers operating in Miami-Dade, this maps directly to the common causes of permit rejection that most often delay closings and inflate carrying costs.
Pro Tip: When running a permit-readiness review, upload the full construction drawing set in PDF format alongside the completed application form. The more complete the package, the more specific the fix list. A partial upload produces a partial review. Submit everything you have, even if some documents are still in draft form, so the platform can flag gaps in the document set rather than gaps in the review.
What experienced flippers actually do differently
The gap between a flipper who loses $20,000 to a permit problem and one who does not is rarely knowledge. Both usually know permits matter. The difference is operational discipline applied before the deal closes, not after the problem surfaces.
Experienced operators price permit risk into the model from day one. That means a dedicated contingency line, not a rounding error in the rehab budget. Add a time buffer of two to four weeks to the expected permit timeline, because plan review queues are longer than they were three years ago in most major markets.
The habits that separate repeatable, low-risk operators from fast-turn operators who get burned:
- Permit coordinator assigned on day one. Not “whoever handles it.” A named person who owns permit status weekly.
- Pre-submission QA before any application goes in. Someone other than the contractor reviews the application package against the municipal checklist.
- Early municipal contact. A pre-application meeting or phone call with the plan reviewer before submission, not after the first objection.
- Conditional closings when permit history is unclear. If the pre-close permit pull surfaces open or missing permits, close conditionally with an escrow holdback rather than waiving the issue to hit a deadline.
- Contractor license verification as a contract prerequisite. Not a trust exercise. A verified license number in the contract, checked against the state board before execution.
The flippers who run clean deals treat permit compliance the same way they treat title insurance: not optional, not delegated without verification, and not something to fix after the fact.
Get a Miami-Dade permit readiness check before you submit
Flippers working in Miami-Dade face one of the more complex permit environments in the country: Miami 21 zoning, FEMA flood overlays, folio-based property records, and Florida DBPR license requirements all intersect on a single application. Getting one element wrong produces the same stop-work exposure described in every case study above.
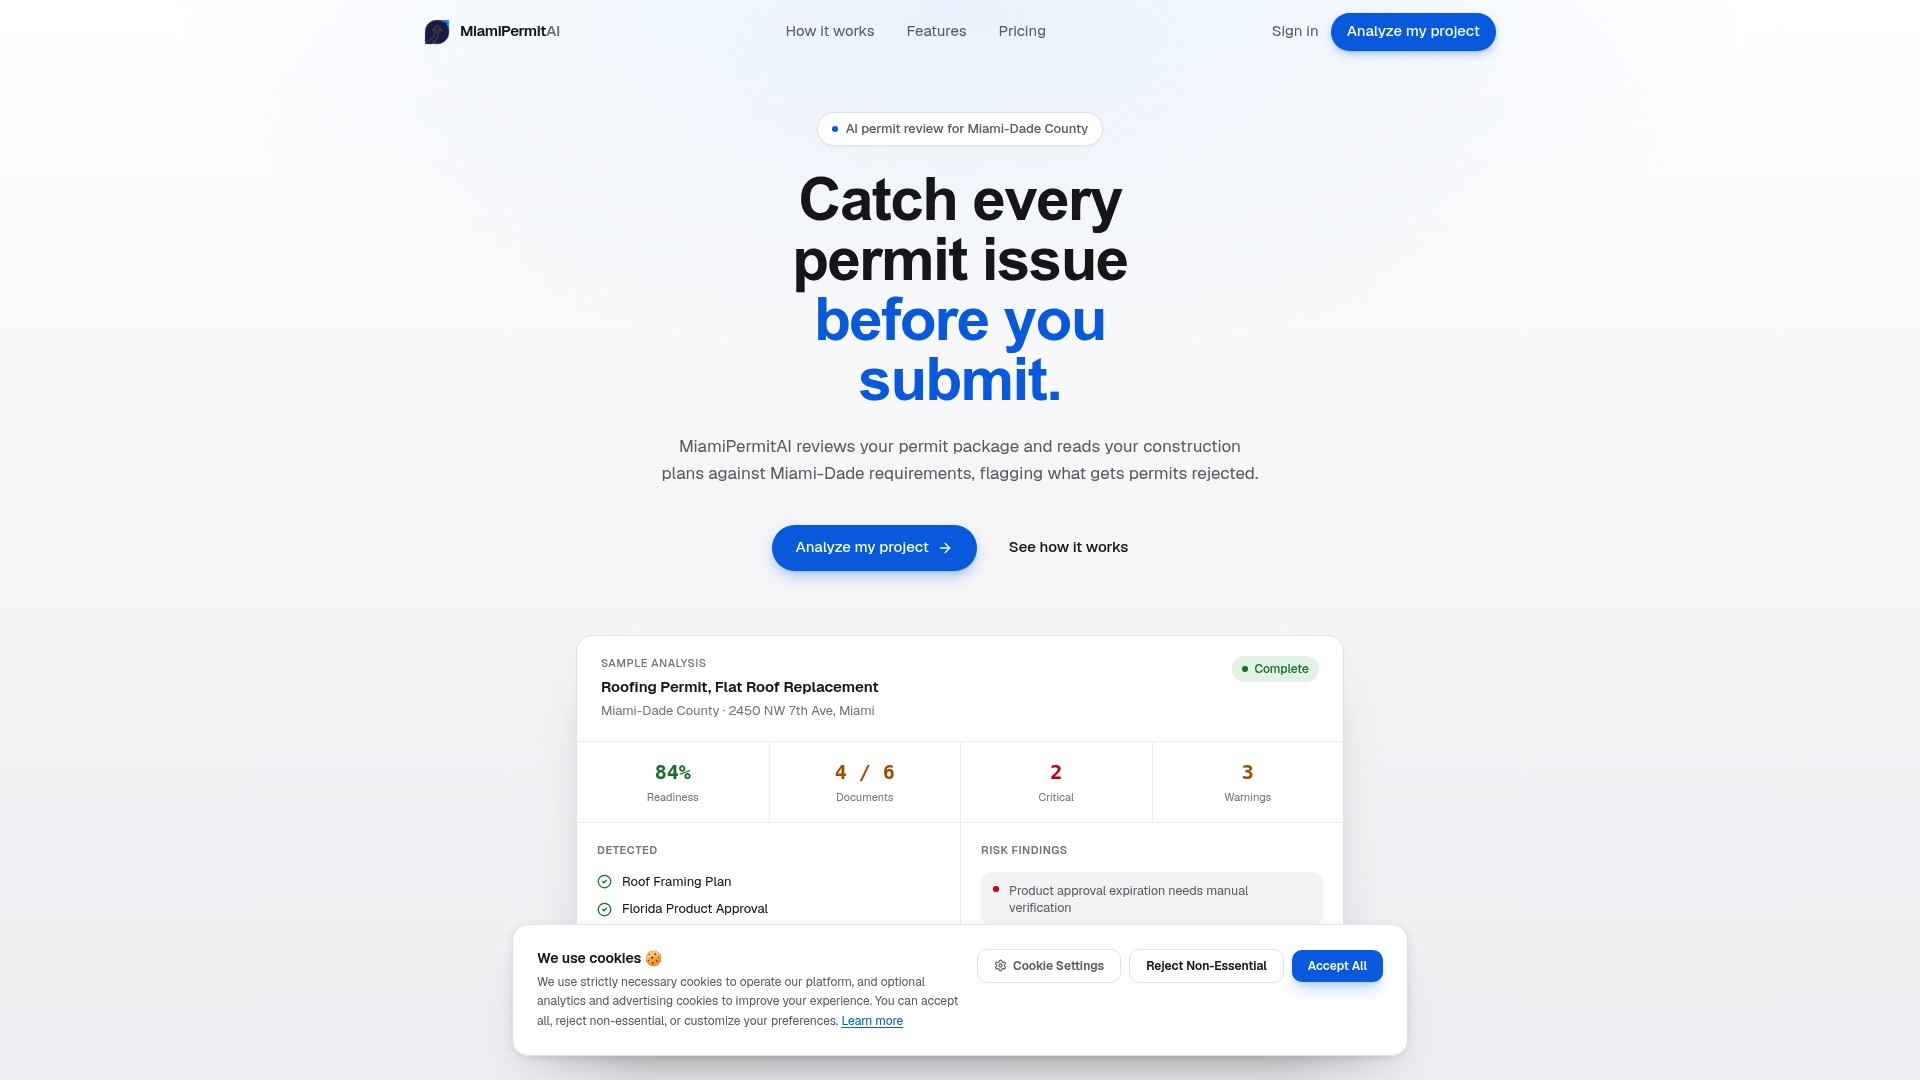
Miamipermitai gives you a readiness score and a prioritized fix list before your application reaches Miami-Dade’s plan reviewers. The platform checks your uploaded construction plans against Miami 21 zoning, FEMA flood zone data, and required document lists, then flags exactly what needs to change. After you submit, it tracks your permit through Miami-Dade’s public records and sends you status updates by email, so you are not refreshing a portal every morning.
- Fewer first-round rejections, which means fewer 3–8 week restarts
- Contractor license verification built into the review, not a separate manual step
- Plain-language fix list, not a generic checklist
- One-time analysis or subscription options for frequent filers
Check your permit readiness before your next Miami-Dade submission and know exactly what needs fixing before it costs you weeks.
Primary sources and further reading
- San Diego lawsuit: developer accused of illegal demolitions and permit evasion — iNewsSource investigative report; use for precedent on municipal civil penalty exposure and multi-property enforcement actions.
- What happens if your contractor pulls the wrong permit? (Hoppler Design & Build) — practitioner guide on NYC DOB misclassification consequences; use for stop-work order timelines and resubmission cost estimates.
- Jefferson Parish inspector general report on third-party inspections — government audit; use for documentation standards and the risk of relying on third-party inspection records without verification.
- The Complete First-Time US Homebuilder’s Permit Guide (BuyASitePlan) — practitioner guide with cost ranges for common permit mistakes; use for incomplete-application cost and timeline benchmarks.
- Permit risks every investor misses (DealIntel) — investor-focused guide on open permit transfer risk and retroactive permitting costs; use for title-stage exposure and cost ranges.
- 7 permit filing mistakes that cost contractors weeks of delays (Permitio) — contractor-focused analysis of filing error patterns; use for average delay estimates by mistake type and pre-submission QA checklists.
This article is general information, not a substitute for advice from a qualified lawyer. Consult a qualified legal professional about your own circumstances before acting on anything here.
Sources
- San Diego lawsuit: developer accused of illegal demolitions and permit evasion
- What happens if your contractor pulls the wrong permit? (Hoppler Design & Build)
- Jefferson Parish inspector general report finds problems with third-party inspections
- The Complete First-Time US Homebuilder’s Permit Guide: 10 critical mistakes that cost $5,000–$50,000
- Permit risks every investor misses (DealIntel)
- 7 permit filing mistakes that cost contractors weeks of delays (Permitio)
Recommended
Is your permit package ready?
Run an AI readiness check against Miami-Dade requirements before you submit.
Try your first analysis freeThis article is general guidance and not legal, engineering, or official county advice. Always verify requirements with Miami-Dade County before submitting a permit.