
August 1, 2026
Geotechnical Report Role in Permit Submission
Geotechnical Report Role in Permit Submission
A permit-ready geotechnical report proves the subsurface conditions that permit reviewers use to verify foundation safety and approve your plans. Without it, most building departments will hold or reject the package at intake before a single plan sheet gets reviewed. The report translates raw soil data — bearing capacity, groundwater depth, seismic stability — into the specific design parameters your structural engineer needs and the permitting authority demands. Agencies from Fairfax County Land Development Services to the U.S. Army Corps of Engineers identify insufficient geotechnical investigation as a primary driver of construction delays, disputes, and cost overruns. Getting the report right before you submit is far cheaper than a re-cycle.
Table of Contents
- When do permit authorities require a geotechnical report?
- Who prepares, seals, and is legally responsible for the report?
- What a permit-ready geotechnical report must include
- How permit reviewers actually use the geotechnical report
- Practical submission checklist to avoid permit delays
- Typical cost, timeline, and report validity
- Executive summary template and evidence-based checklist
- Key Takeaways
- What most permit packages get wrong with geotechnical reports
- Catch geotechnical submission issues before they cost you a review cycle
- Useful sources and local guidance
When do permit authorities require a geotechnical report?
Most jurisdictions tie the requirement to project scale, site conditions, or both. The clearest triggers are new structures on undeveloped land, significant additions, deep excavations, retaining walls over a few feet, major grading operations, and sites in mapped seismic or liquefaction zones. Some counties require a report for nearly every new structure; others only flag it when site conditions raise a red flag during a pre-application screening.
Common project types that typically trigger a geotechnical requirement:
- New single-family homes or additions on hillside, fill, or expansive soil sites
- Multi-story commercial or mixed-use buildings
- Grading permits involving cuts or fills exceeding a few feet
- Retaining walls above a jurisdiction-specific height threshold (often 4 feet)
- Below-grade construction: basements, parking structures, underground utilities
- Projects in FEMA-mapped flood zones or mapped liquefaction hazard areas
- Infrastructure work: bridges, culverts, roadway widening
Seattle’s SDCI, for example, requires a Pre-Application Site Visit for most new construction and any ground disturbance on environmentally critical areas, which often leads directly to a geotechnical report requirement. San Diego’s Development Services Department lists the geotechnical report as a mandatory submittal alongside construction plans and calculations for most building permits. The threshold language varies by jurisdiction, so always check the Authority Having Jurisdiction (AHJ) guidance before scoping your investigation.
Who prepares, seals, and is legally responsible for the report?
A licensed geotechnical engineer must plan and supervise the subsurface exploration, interpret the data, and prepare the report. In most states, that means a Professional Engineer (PE) with geotechnical or civil engineering licensure. The engineer’s signature and seal on the cover page and on each critical appendix is not a formality — it is the legal certification that the findings and recommendations meet the professional standard of care.

San Francisco’s DBI goes further: the licensed geotechnical engineer must also upload a signed and sealed review letter confirming they reviewed and approved the final structural plans, not just the initial report. That step closes the loop between subsurface findings and the structural design actually being permitted.
The permit application itself can be submitted by the property owner, an authorized agent, or the design professional of record. But responsibility for the accuracy of the geotechnical data stays with the engineer of record. If the report is later found to be inadequate, the licensed engineer bears professional and legal liability. Project managers should confirm the geotechnical engineer’s license is current and in good standing in the project state before engaging them.
What a permit-ready geotechnical report must include
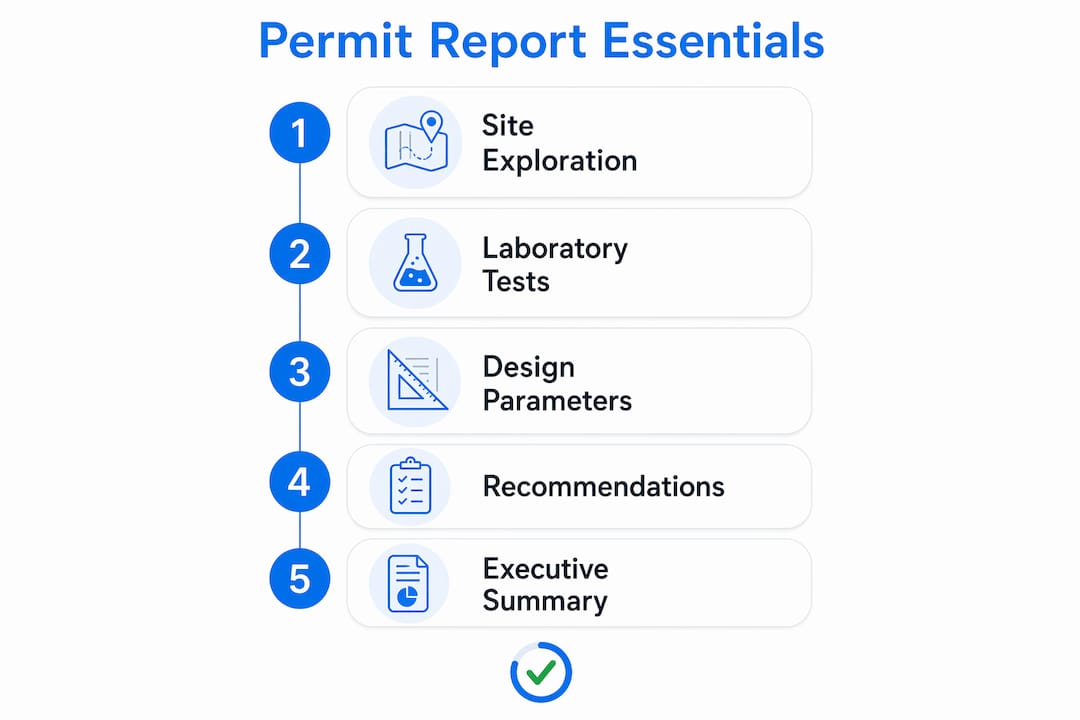
Reviewers work from intake checklists, and a report that omits a required section gets flagged before the technical review even begins. The USACE Engineering Manual EM 1110-1-1804 and Alberta Infrastructure’s geotechnical guidelines both identify the same core sections as non-negotiable for any permit-grade report.
| Report Section | What It Must Contain |
|---|---|
| Executive Summary | Project ID, site address, key findings, foundation recommendation, critical parameters |
| Site Description | Location, topography, existing structures, access, known hazards |
| Scope of Work | Exploration methods, number and depth of borings, lab tests performed |
| Subsurface Exploration Logs | Borehole logs with soil descriptions, sample depths, blow counts (SPT), recovery |
| Laboratory Test Results | Grain size, Atterberg limits, moisture content, consolidation, shear strength |
| Groundwater Observations | Depth at time of drilling, seasonal variation estimate, perched water if present |
| Analysis and Interpretation | Bearing capacity, settlement estimates, lateral earth pressures, seismic site class |
| Foundation Recommendations | Allowable bearing pressure, minimum embedment, pile type and capacity if applicable |
| Earthwork and Drainage Guidance | Compaction specifications, fill material requirements, drainage recommendations |
| Appendices | Full borehole logs, lab data sheets, site plan with boring locations plotted |
The three items that most often cause completeness rejections:
- Borehole locations not plotted on the submitted site plan (or plotted on a plan that does not match the permit set)
- Missing laboratory data sheets in the appendix
- Foundation design parameters stated without units or without referencing the applicable test method
Pro Tip: Every design parameter in the report body — allowable bearing pressure, lateral earth pressure coefficient, compaction requirement — should reference the plan sheet number where that parameter is used. Reviewers cross-check the report against the structural drawings; making that cross-reference explicit cuts technical review time significantly.
The report should also tie its recommendations explicitly to the proposed loads and excavation depths shown in the submitted plans. A report written for a two-story structure that gets submitted with plans for a five-story building will fail technical review regardless of how well it is written.
How permit reviewers actually use the geotechnical report
The review happens in two distinct steps, and understanding both helps you prepare a package that clears each one cleanly.
Step 1 — Completeness check at intake. The permit technician confirms the package contains all required documents before routing it to plan review. At this stage, reviewers are not evaluating the engineering — they are checking boxes. A missing seal, an unsigned cover letter, or a report that does not reference the submitted plan set will stop the package here. Portland’s DevHub process and San Diego’s DSD both require completeness before routing to technical reviewers, and a failed completeness check restarts the clock.
Step 2 — Technical review for design implications. Once the package clears intake, a plan checker or geotechnical specialist reviews the report against the structural and civil drawings. This is where the substantive issues surface.
Common technical red flags that trigger a correction cycle:
- Foundation type on the structural drawings does not match the report’s recommendation
- Allowable bearing pressure used in the structural calculations differs from the report value
- Groundwater depth assumed in the design is shallower than the report documents
- Seismic site class on the structural drawings conflicts with the report’s classification
- Report date is outside the jurisdiction’s currency window (Los Angeles County GMED, for example, requires a report dated within one year of submittal)
- Boring locations shown in the report do not appear on the submitted site plan
Plan-to-report consistency checks are among the fastest ways to avoid a re-cycle. If the structural engineer changes the foundation type after the geotechnical report is issued, the geotechnical engineer must issue an addendum before the package goes to the building department.
Practical submission checklist to avoid permit delays
Follow this sequence from engagement through upload, and you will catch most issues before the reviewer does.
Numbered checklist:
- Confirm whether your jurisdiction requires a geotechnical report for the specific project type and site conditions before engaging the engineer.
- Hire a licensed geotechnical engineer whose PE license is current in the project state; verify through the state licensing board.
- Provide the geotechnical engineer with the proposed foundation type, column loads, excavation depths, and grading plan before fieldwork begins.
- Confirm boring locations are plotted on the same base map used for the permit site plan — not a separate exhibit.
- After the draft report is issued, have the structural engineer review the design parameters before the report is finalized and sealed.
- Confirm the foundation type, bearing pressure, and seismic site class match across the geotechnical report, structural calculations, and plan sheets.
- Obtain the signed and sealed final report and any required cover letter from the geotechnical engineer.
- Name the PDF file clearly: use a convention like
ProjectAddress_GeoReport_EngineerName_Date.pdfso the permit technician can identify it instantly. - Upload the geotechnical report as a separate PDF from the drawing set, per most portal requirements (Portland’s DevHub and Seattle’s portal both require non-drawing documents uploaded separately).
- In the permit application notes, reference the geotechnical report by file name and report date so reviewers can locate it without searching.
- After submission, monitor the portal for correction notices and respond within the jurisdiction’s response window to avoid the application going dormant.
File naming and digital submission tips:
- Keep file names under 50 characters with no special characters or spaces
- Include the report date in the file name (YYYYMMDD format)
- Confirm whether the portal accepts searchable PDFs — most jurisdictions now require them
Pro Tip: When responding to a geotechnical correction notice, submit a written response matrix that lists each reviewer comment, your response, and the revised report page or plan sheet where the correction appears. Reviewers process responses faster when they do not have to hunt for the change. For Miami-Dade projects specifically, permit revision best practices can help you structure that response efficiently.
Coordination between the geotechnical and structural engineers is the single most common gap in permit packages. The structural permit package must reflect the geotechnical report’s parameters exactly. Any divergence between the two documents is a correction cycle waiting to happen.
Typical cost, timeline, and report validity
Timeline by phase:
A standard residential or small commercial geotechnical investigation typically runs three to six weeks from notice to proceed through final report delivery. Larger or more complex projects — multi-story buildings, sites with difficult access, or projects requiring specialty in-situ testing — can take eight to twelve weeks or longer. The phases are: scope and mobilization planning, field exploration (usually one to three days on site for a small project), laboratory testing (one to three weeks depending on the tests required), analysis and report writing, and client review before sealing.
Cost drivers include the number and depth of borings, the laboratory test program, any specialty in-situ tests (pressuremeter, dilatometer, cone penetration), site access constraints, and traffic control requirements for urban sites. A simple residential investigation on a flat, accessible site costs far less than a multi-boring program on a hillside with limited equipment access. The USACE guidance is direct on the economics: a properly scoped investigation costs a fraction of what foundation remediation or construction litigation costs later.
Industry practice cites a practical window of one to two years for most reports, with re-evaluation required when site conditions or project scope change. A report prepared for a different project or different structural loads is not automatically valid for a new design; most jurisdictions require either a new report or a signed letter of applicability from the geotechnical engineer confirming the original findings still govern. That letter must address any changes in loading, excavation depth, or site conditions since the original investigation.
Executive summary template and evidence-based checklist
A one-page executive summary at the front of the report is the single most effective thing you can do to speed technical review. Reviewers who can confirm the critical parameters in 60 seconds are less likely to issue a correction notice for clarification.
Executive summary template fields:
- Project ID and address: permit application number, site address, APN/folio
- Site description: brief note on topography, existing structures, known hazards
- Exploration summary: number of borings, depth range, dates of fieldwork
- Critical design parameters: allowable bearing pressure (psf), minimum embedment depth (ft), seismic site class, design groundwater depth (ft below grade)
- Foundation recommendation: specific foundation type recommended and any conditions
- Limitations and conditions: any contingencies, areas not explored, recommended observations during construction
- Engineer statement and seal: PE name, license number, state, date of report
Checklist mapping summary fields to the full report:
| Summary Field | Full Report Section | Appendix / Plan Sheet |
|---|---|---|
| Exploration summary | Section 3 — Scope of Work | Appendix A: Boring logs |
| Design parameters | Section 6 — Analysis | Appendix B: Lab data sheets |
| Foundation recommendation | Section 7 — Recommendations | Structural plan sheet S-1 |
| Groundwater depth | Section 5 — Groundwater | Boring logs, Table 1 |
| Seismic site class | Section 6 — Seismic Analysis | Structural calculations |
| Limitations | Section 8 — Limitations | N/A |
Writing clear procurement summaries that align with reviewer expectations is a discipline in itself; the same principles that apply to public project documentation apply here: be specific, reference the source data, and leave no ambiguity about what was found and what was recommended.
Pro Tip: State limitations as conditions, not disclaimers. Instead of “this report is not valid if conditions change,” write “if excavation exceeds 12 feet below existing grade, the geotechnical engineer should be notified to evaluate whether the bearing capacity recommendations remain applicable.” Specific, conditional language gives reviewers and contractors clear guidance rather than a vague hedge.
Key Takeaways
A geotechnical report that is properly scoped, sealed, and tied to the submitted plans is the fastest path through permit review — and the surest way to prevent foundation problems from becoming construction-phase emergencies.
| Point | Details |
|---|---|
| Hire the right engineer | Only a licensed geotechnical PE can seal the report; verify the license before engaging. |
| Tie the report to the plans | Every design parameter must reference the plan sheet where it is applied; mismatches cause correction cycles. |
| Include a one-page executive summary | A summary with key parameters and a field-to-appendix cross-reference speeds technical review significantly. |
| Know the validity window | Most jurisdictions treat reports as current for one to two years; a scope or load change may require a new report or a signed letter of applicability. |
| Miamipermitai catches gaps before submission | Miamipermitai’s AI readiness check flags missing seals, plan-to-report inconsistencies, and incomplete appendices before you file. |
What most permit packages get wrong with geotechnical reports
The failure pattern I see most often is not a bad geotechnical report. It is a good report that was never properly connected to the rest of the permit package. The structural engineer used a bearing pressure that was slightly different from the report value, or the foundation type changed after the report was finalized and nobody issued an addendum. The permit technician flags it, the correction cycle opens, and three weeks disappear.
The fix is simple but requires discipline: the geotechnical engineer and the structural engineer need to compare notes after the structural design is substantially complete, not just at the start of the project. One conversation confirming the final foundation type, the design loads, and the excavation depth can prevent the most common correction cycles entirely.
The other recurring issue is the executive summary — or the absence of one. A report that buries the allowable bearing pressure on page 22 of a 40-page document forces the reviewer to search for the number. A report with a one-page summary that lists the critical parameters, references the appendix, and states the foundation recommendation clearly gets through technical review faster. That is not a coincidence.
For teams working in Miami-Dade, common permit rejection reasons often trace back to exactly these coordination gaps. Running a permit-readiness check before submission catches the inconsistencies that are easy to miss when you are deep in a project.
Catch geotechnical submission issues before they cost you a review cycle
Permit packages fail at intake for predictable reasons: a missing seal, a report that does not reference the submitted plan set, an appendix that was not uploaded. Miamipermitai’s AI readiness platform checks your uploaded construction plans and documents against Miami-Dade requirements before you submit, flagging exactly these issues — missing geotechnical report references, plan-to-report parameter mismatches, unsigned or unsealed documents, and incomplete appendices.
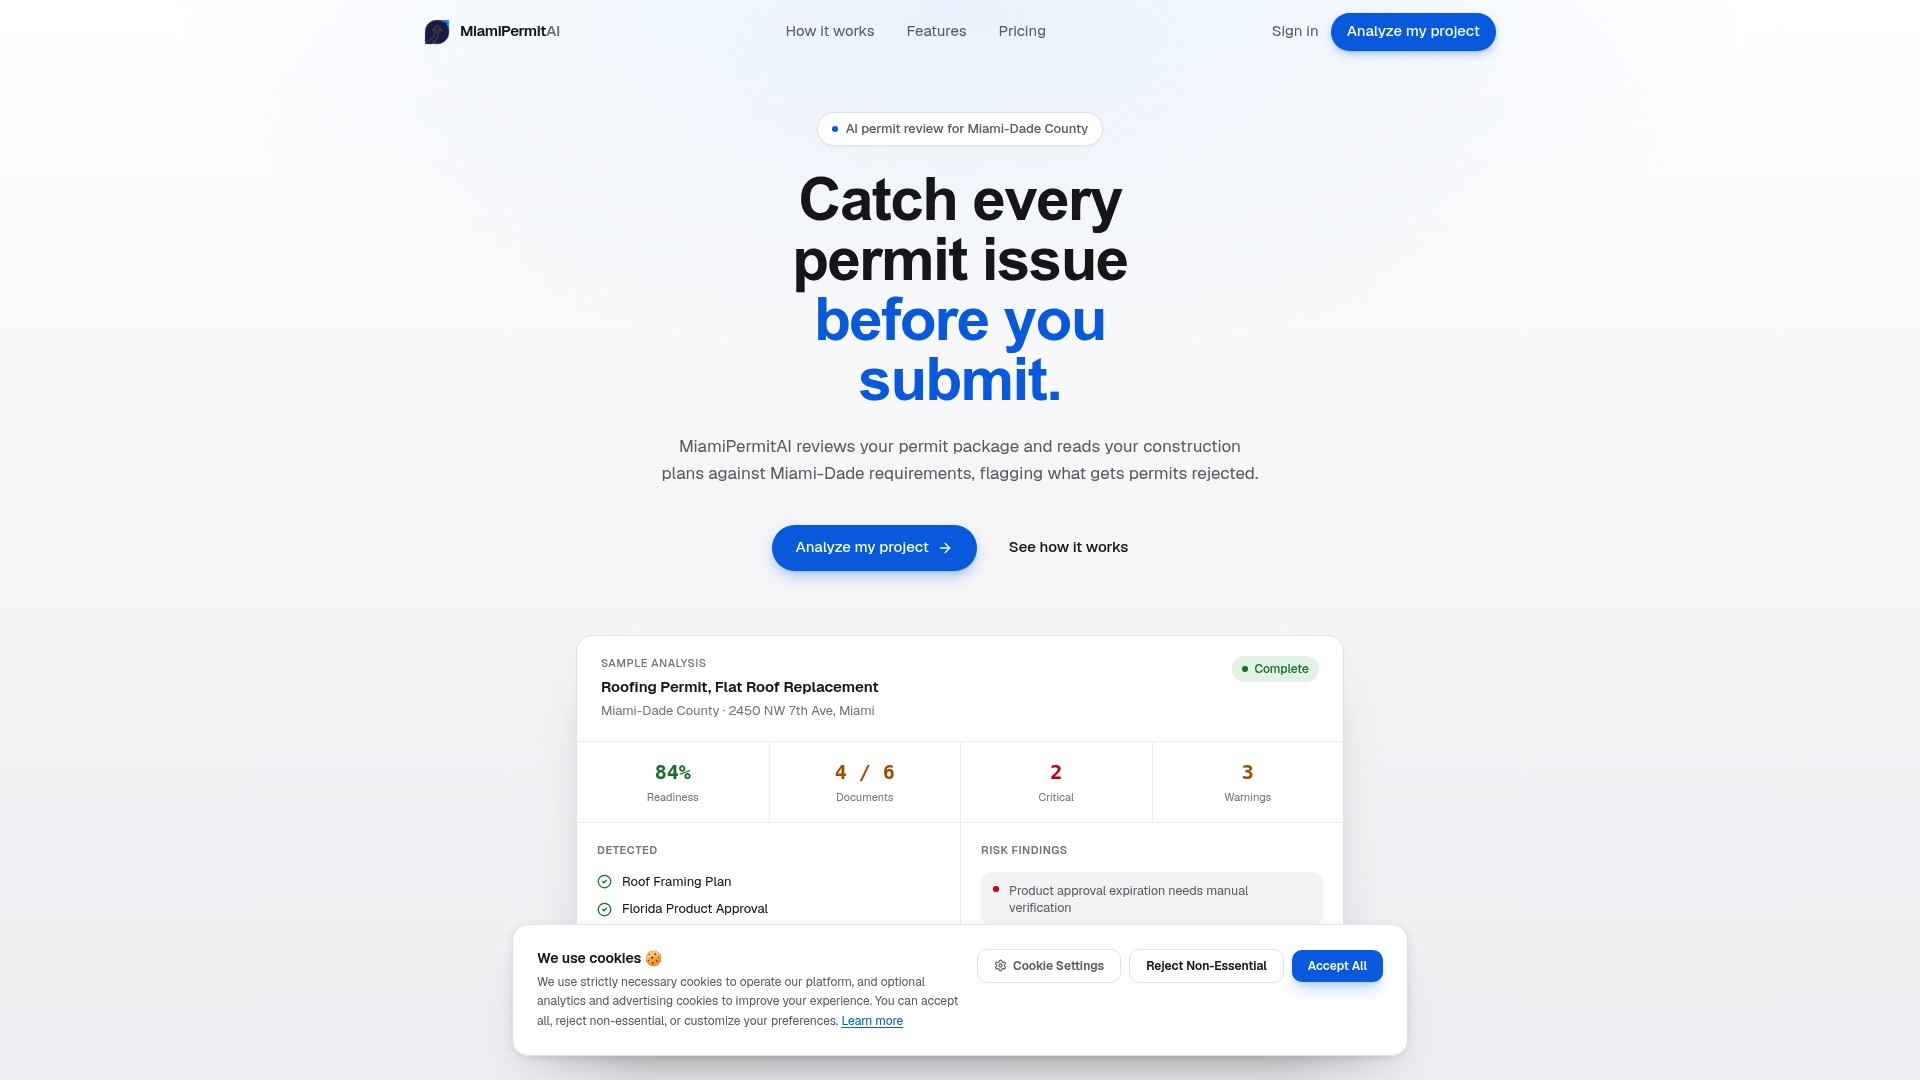
The platform does not replace your licensed geotechnical engineer. What it does is catch the administrative and consistency errors that cause correction cycles before the building department sees them. You get a readiness score, a plain-language list of what to fix, and the confidence that your package is complete when it hits the portal. Check your permit package before you submit and skip the first correction cycle entirely.
Useful sources and local guidance
These primary references cover intake rules, technical standards, and submission requirements across U.S. jurisdictions. Check your local AHJ guidance for jurisdiction-specific nuances — the thresholds and format requirements vary more than most practitioners expect.
- Fairfax County Land Development Services — Geotechnical Report (SR): County-level intake checklist and completeness requirements; best for understanding what triggers a report requirement and what reviewers check at intake.
- Los Angeles County GMED Geotechnical Manual (2024): Detailed technical standards including the one-year currency requirement and bar-scale requirements for plan sheets; best for technical parameters and report format.
- San Francisco DBI — Geotechnical Report and Third-Party Engineering Review: Step-by-step submission guidance including the signed and sealed review letter requirement; best for understanding the engineer’s submission obligations.
- City of San Diego — Geotechnical Report Guidance: Covers report scope, completeness checks, and digital signature requirements; useful for both intake rules and technical scope guidance.
- USACE Engineering Manual EM 1110-1-1804: The national standard for geotechnical report content and appendix requirements; best for technical parameters and design summary guidance.
- FHWA Geotechnical Review Checklists and Technical Guidelines: Federal review checklists for major and unusual geotechnical features; best for understanding what a specialist reviewer looks for on complex projects.
- Portland.gov — Submit Plans Online: Practical guidance on the Single PDF Process and digital document upload requirements; best for understanding file naming and portal submission conventions.
- Seattle SDCI — How Do You Get a Permit?: Covers Pre-Application Site Visit requirements and when geotechnical review is triggered; best for understanding pre-application screening processes.
Recommended
Is your permit package ready?
Run an AI readiness check against Miami-Dade requirements before you submit.
Try your first analysis freeThis article is general guidance and not legal, engineering, or official county advice. Always verify requirements with Miami-Dade County before submitting a permit.